The User Management settings can be modified within the platform by first clicking the user profile drop-down in the top right corner of the platform, and then select "Settings." Locate "Organizational Settings" and select "User Management." The User Management screen is shown below:

Here the platform's users are displayed in a table with information including the account's username, email address, name, role, phone, status, and the creation date of the account. At the top of the table, selecting Vendor will display a table of the platform's vendors and each vendor's information as well. For more information on Vendors see the Supplier Risk Management articles.
Add User
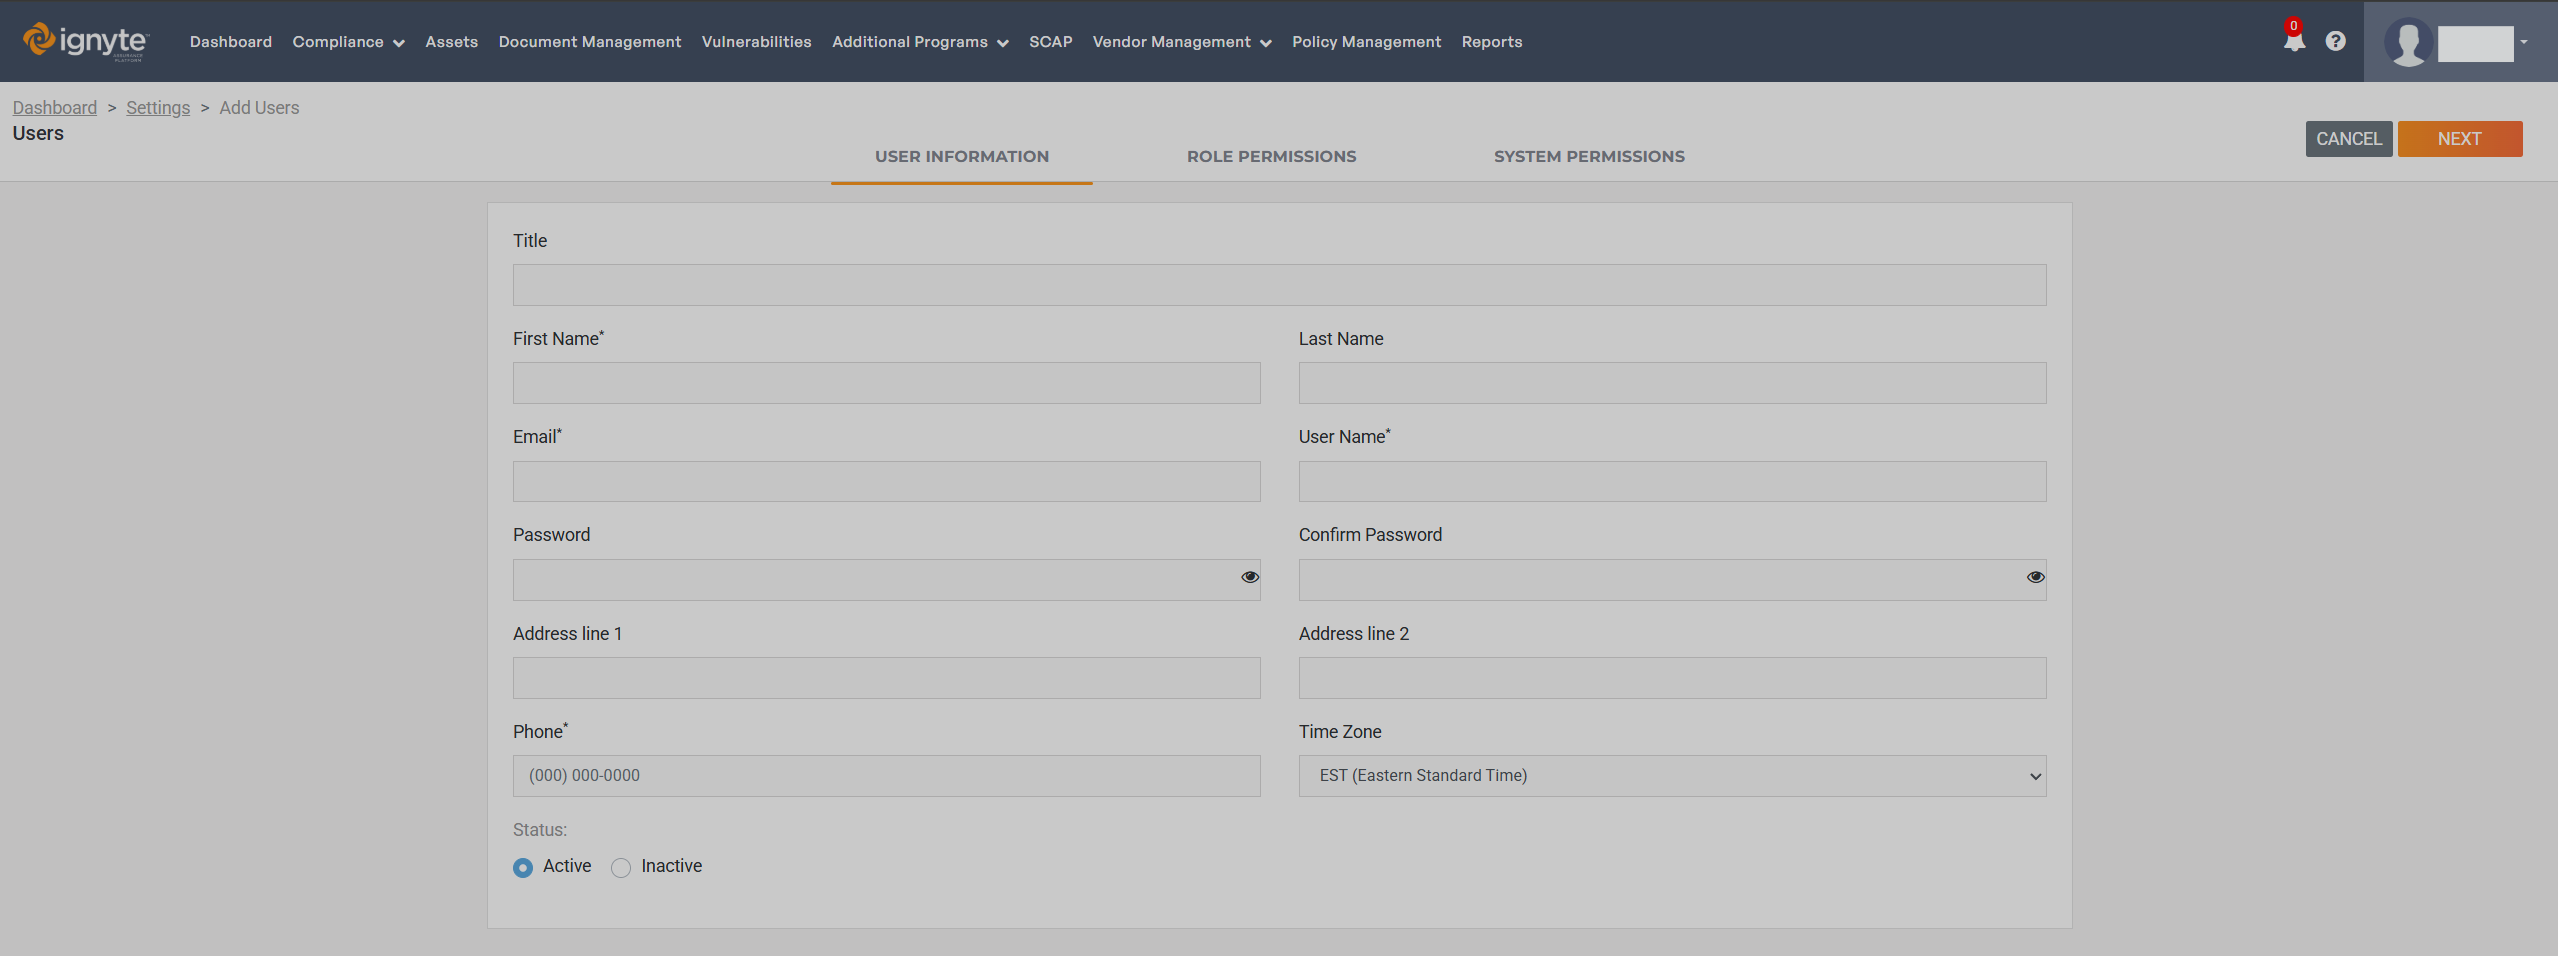
Users can be added by clicking the orange + ADD USER button in the top right corner under the user drop-down menu. This will display the page below:
Adding a new user is completed through a three-step workflow, presented as tabs at the top of the screen:
1. User Information
2. Role Permissions
3. System Permissions
Each step must be completed in order before the user can be created.
Step 1: User Information
The User Information tab contains the core user profile details. This step reflects the same user information fields available in the previous design.
The following fields are available:
Title
First Name
Last Name
Email
Username
Address Line 1
Address Line 2
Phone Number
Time Zone
Status (Active or Inactive)
Once all required fields are completed, click Next to proceed to the Role Permissions tab.
Step 2: Role Permissions
The Role Permissions tab allows you to assign a role to the user.

Select Role
Use the Select Role drop-down to assign a role.
The drop-down displays:
Default system roles
Custom roles created by your organization
Role Permissions View
The permissions associated with the selected role are displayed below.
Expand All and Collapse All options are available to quickly view or hide permission categories for the selected role.
Manage Roles
The Manage Roles button navigates to the Roles Management page.
From there, you can create or modify custom roles.
Newly created roles will automatically appear in the Select Role drop-down.
After selecting a role, click Next to continue to the System Permissions tab.
Step 3: System Permissions
The System Permissions tab controls which systems the user can access.
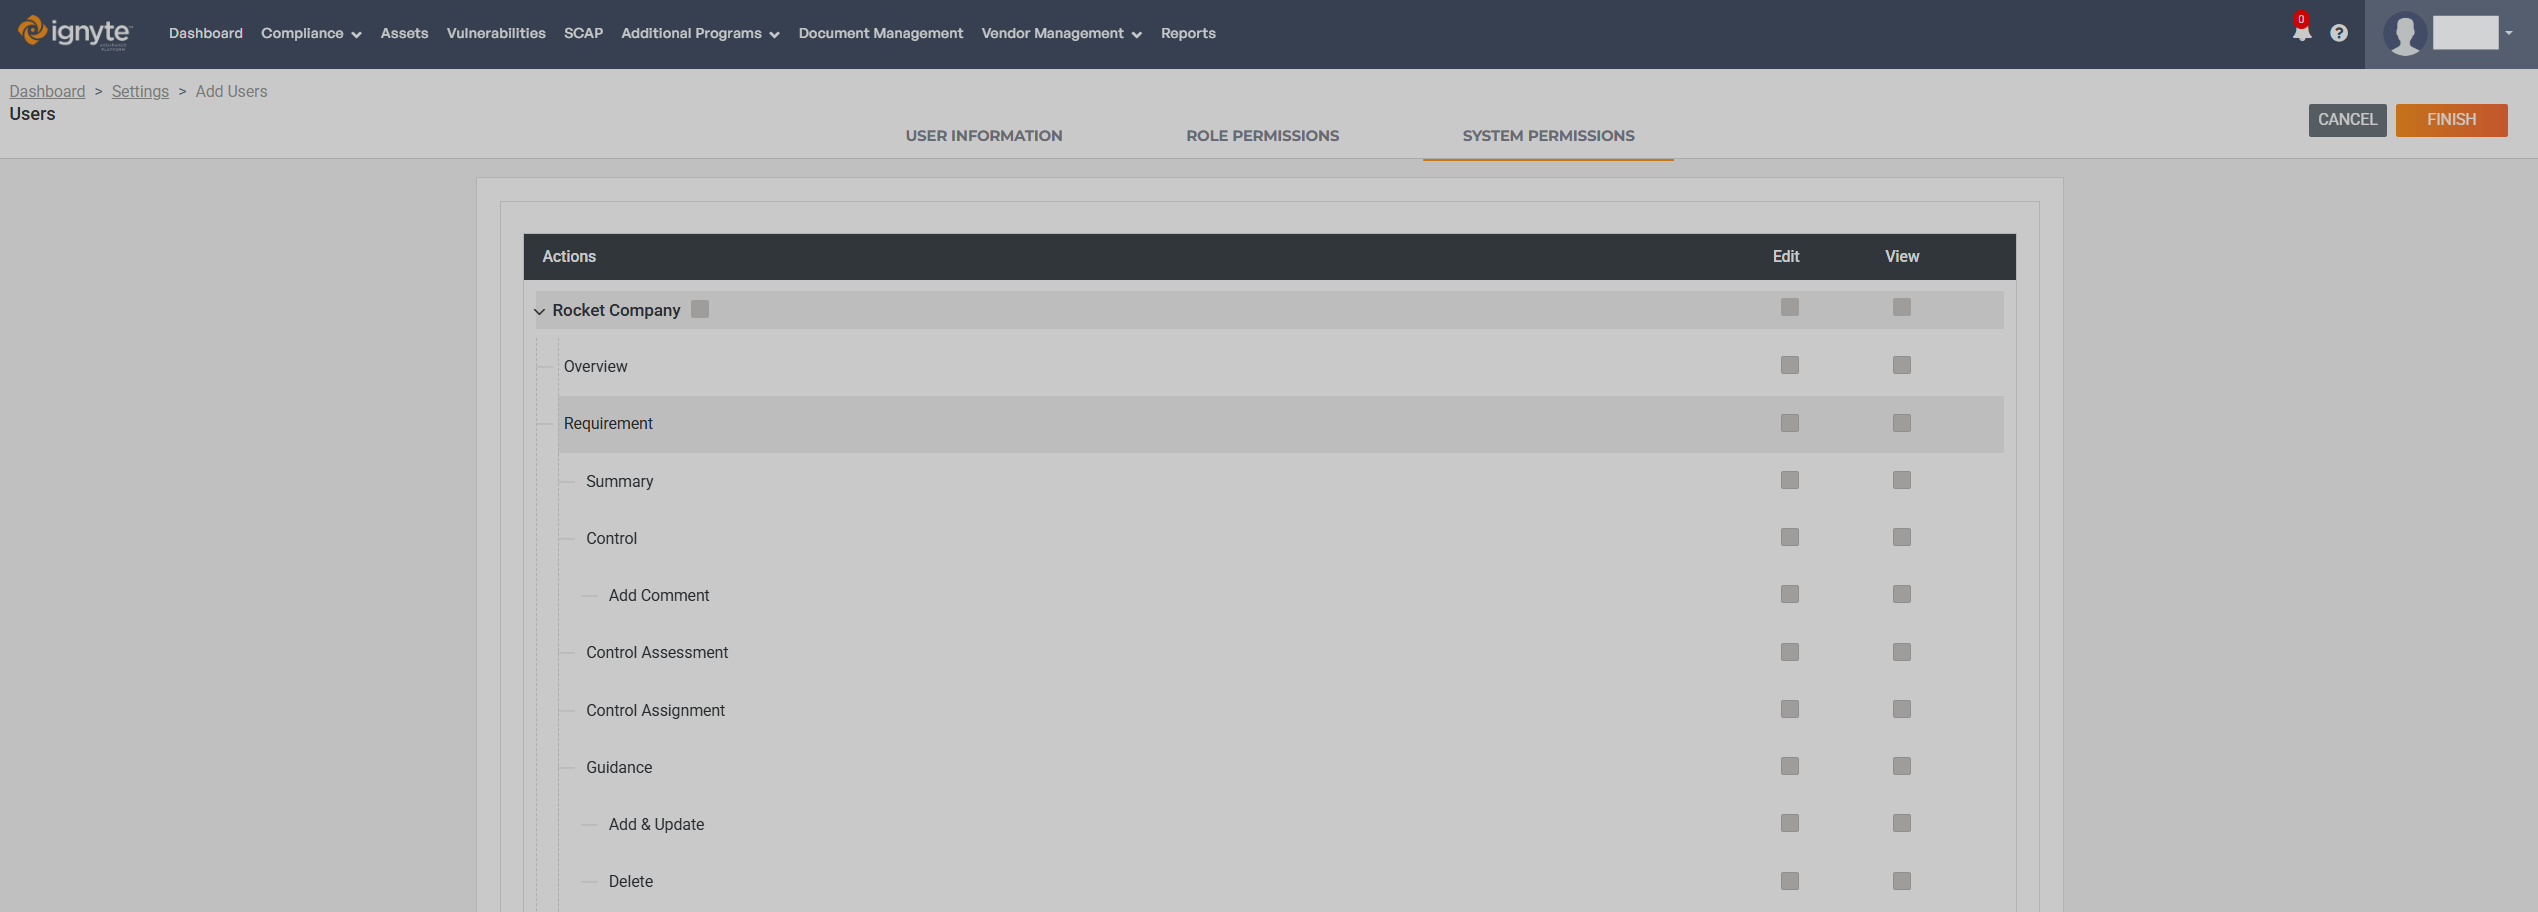
Select one or more systems to grant the user access.
Each system can be expanded to specify which roles the user will have within that system.
Role assignments at the system level determine the user’s access and permissions for that specific system.
Once all required system selections and role assignments are completed, click Finish to create the user.